Pics of a brew day
85 posts
• Page 4 of 5 • 1, 2, 3, 4, 5
Re: Pics of a brew day
![]() by lethaldog » Thursday Apr 10, 2008 6:22 pm
by lethaldog » Thursday Apr 10, 2008 6:22 pm
Not sure bout the chiller as i use an immersion but as far as the tape goes just the standard stuff is fine 
Cheers
Leigh
Leigh
-

lethaldog - Posts: 2716
- Joined: Wednesday Jul 19, 2006 11:13 am
- Location: Victoria
Re: Pics of a brew day
![]() by drsmurto » Friday Apr 11, 2008 12:43 pm
by drsmurto » Friday Apr 11, 2008 12:43 pm
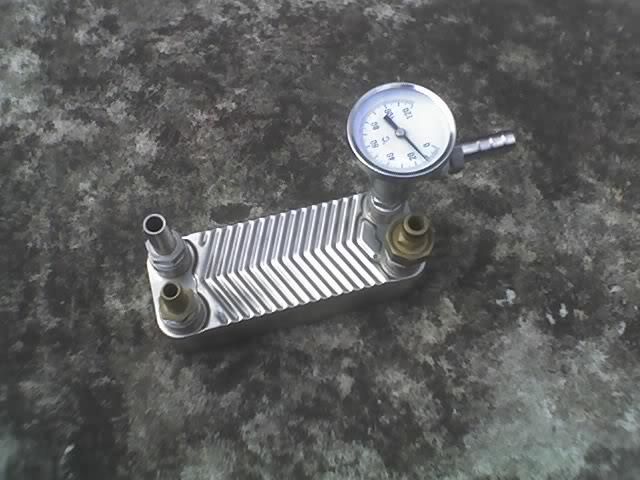
Water and wort do travel in opposite directions thru the plate chiller. Should take a pic of mine now i have the thermo attached directly.
-

drsmurto - Posts: 3300
- Joined: Friday Nov 17, 2006 11:53 am
- Location: Adelaide Hills
Re: Pics of a brew day
![]() by James L » Monday Apr 14, 2008 11:17 am
by James L » Monday Apr 14, 2008 11:17 am
mmm... that was another question i was going to ask, the thermometer connected to the end of the plate chiller.
I would like to see some pics to see how you went about connecting it to the chiller. I was thinking about using a T piece and having the thermometer in the piping enough to get a good temp, but not effect the flow in any way. I think i'll need to take it all into a hose and fitting shop and sort it all out there.
My refractometer arrived. not sure how to use it yet.. but its Tiny.. (it has a clip so you can put it in your pocket like a pen). I look through it to a direct light source and still only get a faint green. There is no scale that i can see.. Might need to use a brighter light.
I attached the false bottom to the mash tun and tightened all the fitting. It seem that after the tightening, it looks like the false bottom has lifted in some areas about 1-2mm from the base of the esky... Is this small space large enough to cause a big problem when it comes to the mash? or will it just require a little more recirculation before i get the clear liquor? it guess i could try and modify my connecting pipe that i hastily made, but is it really worth stuffing it up for to bend it another 1-2 mm...
Purhcased some pyrex media bottles... to collect and grow yeast... expensive, but you can boil and cool in the same bottle without the fear of it breaking on you. I thought instead of getting a magnetic stirrer from work, i would take a single shaker platform that would be able to aerate the wort at about the same rate (depending on the ocillation speed).
So its all go... only two things standing in my way.. The URN.... and a two week holiday to monkey mia starting on friday....

I freely admit that I was Very Very Drunk....
"They speak of my drinking, but never consider my thirst."
-

James L - Posts: 1045
- Joined: Thursday Jun 07, 2007 10:11 am
- Location: Perth WA
Re: Pics of a brew day
![]() by drsmurto » Monday Apr 14, 2008 11:47 am
by drsmurto » Monday Apr 14, 2008 11:47 am
James
Got my thermo fitted by Wayne so cant really help you there. Pic attached so you can see how it looks.
As for the refractometer, got that from Wayne also - hell, most of my setup i got from him! Its not that small and has a nice blue background. I rarely use my hydro now the refract has been calibrated for both unfermented and fermenting/fermented wort.
If you add the strike water to your mash tun first and then add your grain you shouldnt get as much lifting of the falsie. Not to mention less dough balls.
I have both pyrex bottles and conical flasks and use them for starters, washing yeast and can boil/cool in them also.
-
drsmurto - Posts: 3300
- Joined: Friday Nov 17, 2006 11:53 am
- Location: Adelaide Hills
Re: Pics of a brew day
![]() by James L » Monday Apr 14, 2008 12:27 pm
by James L » Monday Apr 14, 2008 12:27 pm
I see what he's done there with the thermo... its a simple male to male fitting out of the plate chiller, then its a matter of getting an all female t-piece, so the thermo goes in on end, and the hoestail in the other, and the remaining end connecting to the male fitting.
So hopefully, it should be a matter of grabbing a 1/2 inch male to male, and a 1/2 inch teepiece... I only thing i'm not sure about is the length of the thermometer probe being too long for the tee piece and affecting flow. But we are only talking about a litre/minute or thereabouts.
As for the falsie, because i no longer have a hose connecting the bulkhead to the false bottom (i had to make a stainless tube because the hose wasnt flexible enough), the false bottom is always lifted, whether there is water in there or not. I might just have to bend the stainless a little more.
I freely admit that I was Very Very Drunk....
"They speak of my drinking, but never consider my thirst."
-
James L - Posts: 1045
- Joined: Thursday Jun 07, 2007 10:11 am
- Location: Perth WA
Re: Pics of a brew day
![]() by drsmurto » Monday Apr 14, 2008 12:44 pm
by drsmurto » Monday Apr 14, 2008 12:44 pm
You need a base for the falsie like i have! Still get a little bit of grain inside it but thats expected since i crush my grain quite fine.
-
drsmurto - Posts: 3300
- Joined: Friday Nov 17, 2006 11:53 am
- Location: Adelaide Hills
Re: Pics of a brew day
![]() by James L » Thursday Apr 17, 2008 12:10 pm
by James L » Thursday Apr 17, 2008 12:10 pm
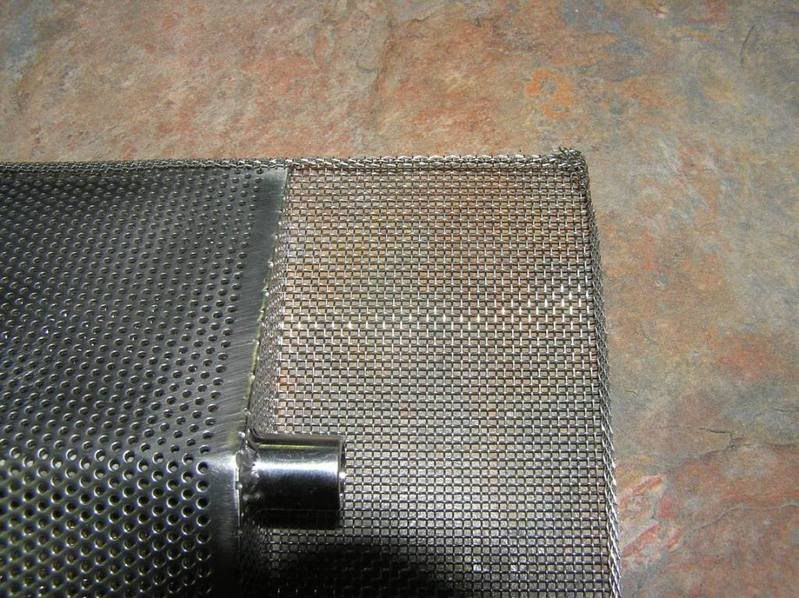
I made my own base using high grade stainless mesh that i managed to get from work for free... Being mesh, its quite easy to bend/hammer.
I ended up making a 90 degree bend in the mesh at a length of 5mm to butt up against the shorter end with the hose attachment, and then i bent 5mm along the two long ends to produce essentially a mesh slide for the false bottom to slide in to.
There are no gaps bigger than 0.5mm.. i'll send a photo, as soon as i work out how to post them onto the forum...
I think it was probably the cheapest and simplest option, and becuase its SS, it wont rust (because i was thinking about making it out of aluminium fly wire).
I freely admit that I was Very Very Drunk....
"They speak of my drinking, but never consider my thirst."
-
James L - Posts: 1045
- Joined: Thursday Jun 07, 2007 10:11 am
- Location: Perth WA
Re: Pics of a brew day
![]() by rwh » Thursday Apr 17, 2008 12:45 pm
by rwh » Thursday Apr 17, 2008 12:45 pm
James L wrote:i'll send a photo, as soon as i work out how to post them onto the forum...
viewtopic.php?f=9&t=6098
w00t!
-

rwh - Posts: 2810
- Joined: Friday Jun 16, 2006 1:47 pm
- Location: Melbourne, Australia
Re: Pics of a brew day
![]() by sonictruth » Sunday Apr 20, 2008 8:29 am
by sonictruth » Sunday Apr 20, 2008 8:29 am
i just picked up my new esky (soon to be mash tun). Its a new 55L willow, same as the Dr's and James' by the sound of it. It is red tho so it should mash faster.
I bought it off a guy on ebay. For some reason he had it listed as 5.5L with a starting bid of $20 but of course noone bid on it. Me thinks i got a bargain
Did you guys use the inbuilt drain plug for attaching the tap setup? im hoping to avoid having to drill a hole in the esky, mainly because i dont have a drill.
- sonictruth
- Posts: 107
- Joined: Wednesday Feb 28, 2007 1:22 pm
Re: Pics of a brew day
![]() by rwh » Monday Apr 21, 2008 12:12 am
by rwh » Monday Apr 21, 2008 12:12 am
You should be able to avoid drilling. The normal way to do it is to use a drilled bung (available from most HBSes). You the outlet pipe from your manifold through the hole in the bung, then insert the bung into the drain hole... 
w00t!
-
rwh - Posts: 2810
- Joined: Friday Jun 16, 2006 1:47 pm
- Location: Melbourne, Australia
Re: Pics of a brew day
![]() by drsmurto » Monday Apr 21, 2008 11:52 am
by drsmurto » Monday Apr 21, 2008 11:52 am
Yep, no mods needed to the hole in the esky if its the same as mine.
I can remove the falsie and put the bung back in and noone is any wiser!
I can remove the falsie and put the bung back in and noone is any wiser!
-
drsmurto - Posts: 3300
- Joined: Friday Nov 17, 2006 11:53 am
- Location: Adelaide Hills
Re: Pics of a brew day
![]() by Trough Lolly » Tuesday Apr 22, 2008 9:54 am
by Trough Lolly » Tuesday Apr 22, 2008 9:54 am
And if anyone detects a faint barley flavour in the water when you use it at the picnic, tell them you use the esky as a "Barley Juicer" and they'll think you're on a health kick!!


-

Trough Lolly - Posts: 1647
- Joined: Friday Feb 16, 2007 3:36 pm
- Location: Southern Canberra
Re: Pics of a brew day
![]() by James L » Monday May 05, 2008 12:38 pm
by James L » Monday May 05, 2008 12:38 pm
I think i have worked out how to upload photos....
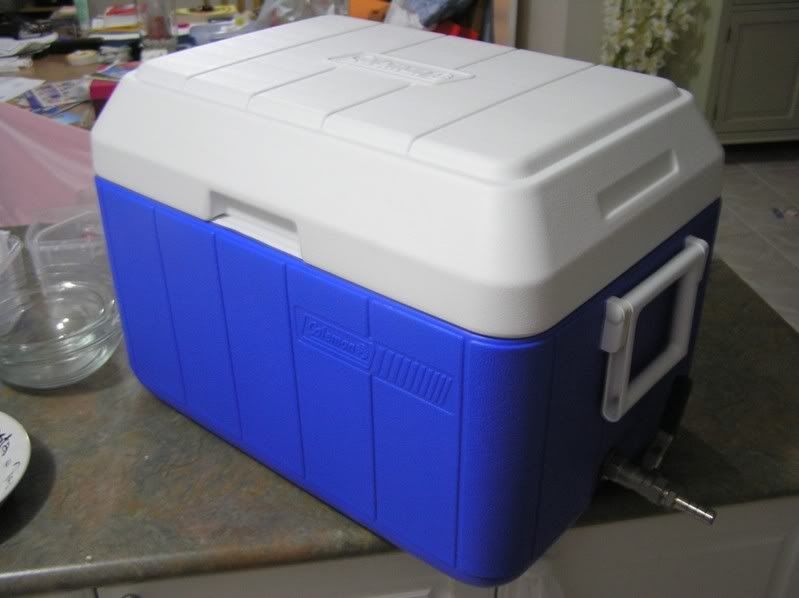
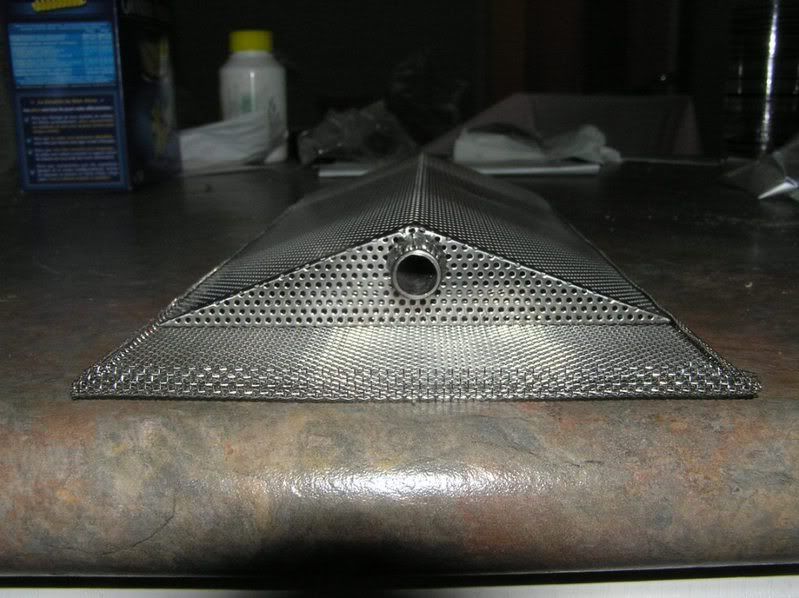
This is the coleman esky i ended up choosing.. it is wider than the others, and had a nice flat bottom.
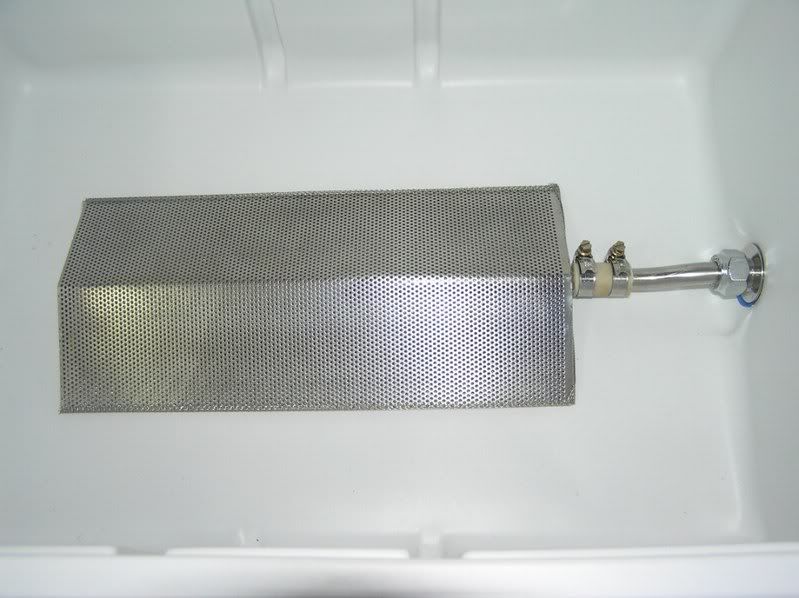
This is the inside... i had to make up that stainless fitting to connect the falsie to the esky drain hole. That tubing connecting the stainless is expensive masterflex temp tolerant food grade tubing.
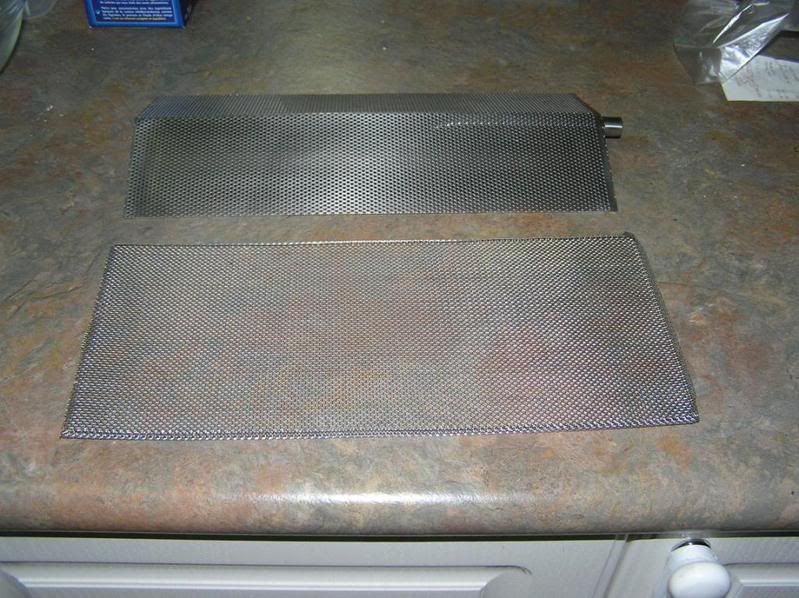
This is the grating for underneath the false bottom that i made from stainless mesh.
Other angles...
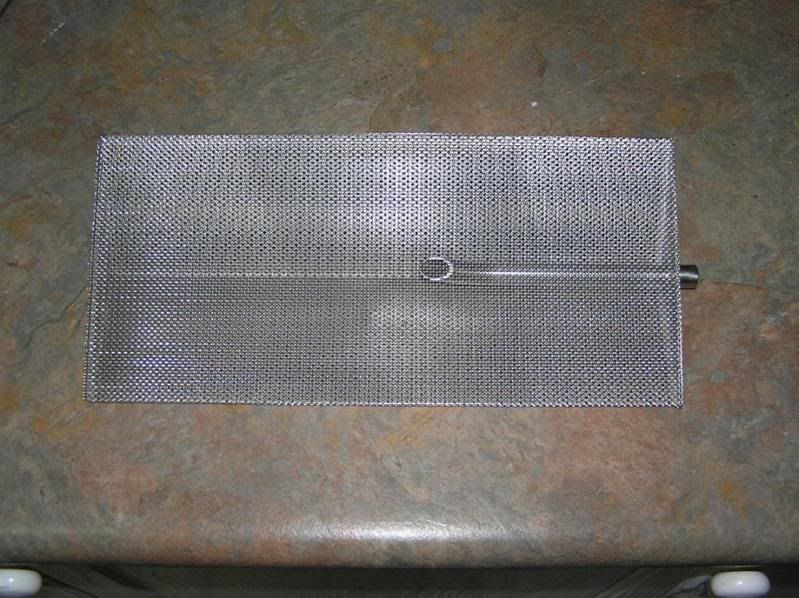
this is the underneath... fits quite well
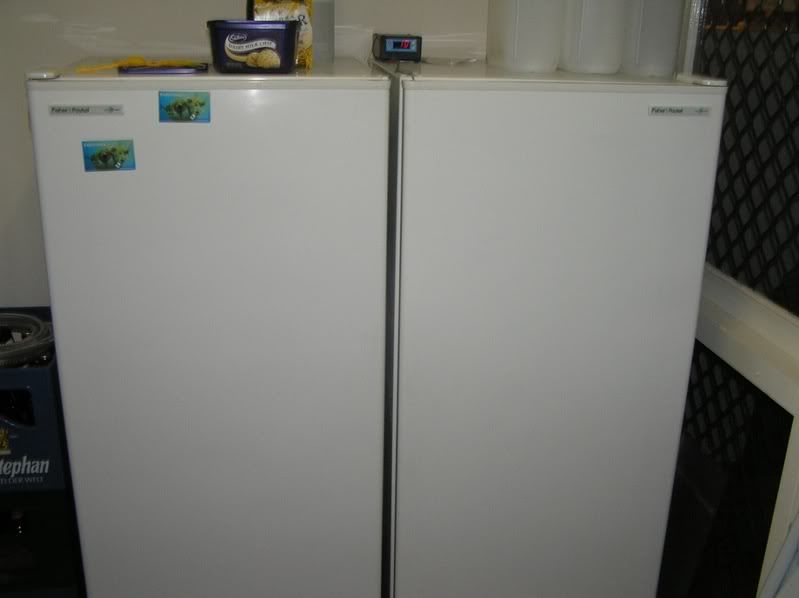
Brew fridge (on the right).
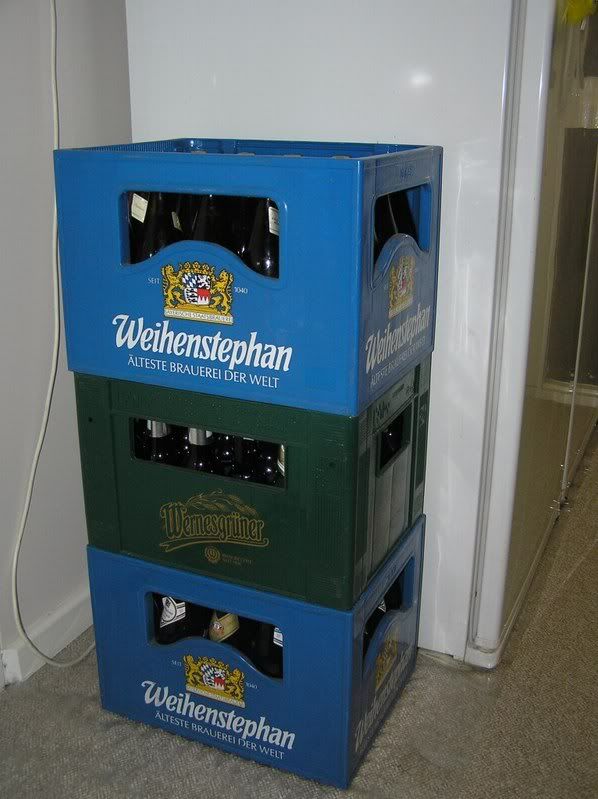
These are a few of my many beer crates.
This is the coleman esky i ended up choosing.. it is wider than the others, and had a nice flat bottom.
This is the inside... i had to make up that stainless fitting to connect the falsie to the esky drain hole. That tubing connecting the stainless is expensive masterflex temp tolerant food grade tubing.
This is the grating for underneath the false bottom that i made from stainless mesh.
Other angles...
this is the underneath... fits quite well
Brew fridge (on the right).
These are a few of my many beer crates.
I freely admit that I was Very Very Drunk....
"They speak of my drinking, but never consider my thirst."
-
James L - Posts: 1045
- Joined: Thursday Jun 07, 2007 10:11 am
- Location: Perth WA
Re: Pics of a brew day
![]() by drsmurto » Monday May 05, 2008 12:46 pm
by drsmurto » Monday May 05, 2008 12:46 pm
FWIW the holes in the mesh look larger than the holes in the falsie. You may need to recirculate for longer than i do (about 1L).The underneath of mine is a flat piece of ss with no holes.
So when is the maiden voyage?
So when is the maiden voyage?
-
drsmurto - Posts: 3300
- Joined: Friday Nov 17, 2006 11:53 am
- Location: Adelaide Hills
Re: Pics of a brew day
![]() by James L » Monday May 05, 2008 1:18 pm
by James L » Monday May 05, 2008 1:18 pm
Yeh, the holes in the mesh are slightly larger than the falsie, but i was mainly worried about the large chunks of grain blocking the pickup, and hopefully the mesh should stop that... I chose mesh because it was a little easier to work with, and i thought if i went any finer i might have dramas with blackages... I dont mind recirculating a little longer..
I'm still trying to find a 30L urn... thats whats holding me up... i'm hoping to just borrow a smaller one from work or hiring one and make do with that until i can get a reasonable one secondhand. If i have to use a smaller urn. If all goes well, the maiden voyage should be in the next few weeks (maybe even this weekend as the brew fridge is empty). no icebergs i hope...
Bought grain on saturday.. 25kg JW pilsener malt, 25kg JW traditional pale malt... munich ,wheat and vienna, caramunich, crystal, melanoidin. Thought i'd go the cheaper option grain wise until i find my feet. also managed to finally get the 1056 ale yeast and kolsch yeast.
I freely admit that I was Very Very Drunk....
"They speak of my drinking, but never consider my thirst."
-
James L - Posts: 1045
- Joined: Thursday Jun 07, 2007 10:11 am
- Location: Perth WA
Re: Pics of a brew day
![]() by drsmurto » Monday May 05, 2008 1:47 pm
by drsmurto » Monday May 05, 2008 1:47 pm
I have a 15L stock pot that i used to heat up water and its still used on double brew days. Beg, borrow or steal something large enough to heat >10 L of water in.
You can always batch sparge in 2 lots, i do that sometimes.
Man, i would be borrowing kettles from neighbours and work if i was in your position!
You can always batch sparge in 2 lots, i do that sometimes.
Man, i would be borrowing kettles from neighbours and work if i was in your position!
-
drsmurto - Posts: 3300
- Joined: Friday Nov 17, 2006 11:53 am
- Location: Adelaide Hills
Re: Pics of a brew day
![]() by James L » Friday May 16, 2008 10:06 am
by James L » Friday May 16, 2008 10:06 am
Still havent done a brew yet...
I've spent the last few weeks contemplating whether to bite a rather large bullet and buy a new urn, or try and find a second hand one somewhere for a reasonable price. There seems to be a drought of secondhand urns in W.A. I've checked the local catering auctions and on ebay, called the local secondhand dealer (who hand one 40L for more that what i was to buy new ($395!!!) and didnt come with warranty), and looked at catering places, and new seems to be the only option (unless i want to keep waiting for another 2-3 weeks).
So this afternoon i'm going to caterlink to buy a brand spanking new 30L Roband Urn for 300 bucks, then i'm going to destroy it by drilling a hole in it to fit my weldless thermometer. seems silly, but if i cant get a second handy, this is my only option.
Then my death star will be fully operational and my journey to the dark side will be complete.....
I freely admit that I was Very Very Drunk....
"They speak of my drinking, but never consider my thirst."
-
James L - Posts: 1045
- Joined: Thursday Jun 07, 2007 10:11 am
- Location: Perth WA
Re: Pics of a brew day
![]() by drsmurto » Friday May 16, 2008 10:48 am
by drsmurto » Friday May 16, 2008 10:48 am
It would be cheaper to buy a 30L aluminium pot and use that to heat your water. $300 buys you a lot of cool gadgets. Hell, you could buy another NASA burner, reg and a gas bottle plus the pot for less than that!
-
drsmurto - Posts: 3300
- Joined: Friday Nov 17, 2006 11:53 am
- Location: Adelaide Hills
Re: Pics of a brew day
![]() by James L » Friday May 16, 2008 11:38 am
by James L » Friday May 16, 2008 11:38 am
I thought about that... but i want to be able to control the temp of the water... kinda set and forget... work out what number on the dial corresponds to the temp you need for the various steps...
I worked out if i wanted to get a pot, and an immersion heater, and thermostat, and taps and bulkhead fittings you wont get much change out of 250 bucks... so pay an extra 50 and get it all in one handy package... plus its stainless instead of aluminium.
I worked out if i wanted to get a pot, and an immersion heater, and thermostat, and taps and bulkhead fittings you wont get much change out of 250 bucks... so pay an extra 50 and get it all in one handy package... plus its stainless instead of aluminium.
I freely admit that I was Very Very Drunk....
"They speak of my drinking, but never consider my thirst."
-
James L - Posts: 1045
- Joined: Thursday Jun 07, 2007 10:11 am
- Location: Perth WA
Re: Pics of a brew day
![]() by gazpachos0up » Saturday Nov 29, 2008 1:42 pm
by gazpachos0up » Saturday Nov 29, 2008 1:42 pm
Hey there,
Just wanted to ask, when you say you boil in a converted keg is that just a keg with a hole cut in the top and a tap put in the base? How did you go about putting the tap in?
Just wanted to ask, when you say you boil in a converted keg is that just a keg with a hole cut in the top and a tap put in the base? How did you go about putting the tap in?
- gazpachos0up
- Posts: 108
- Joined: Sunday Apr 29, 2007 6:06 pm
85 posts
• Page 4 of 5 • 1, 2, 3, 4, 5
Who is online
Users browsing this forum: No registered users and 48 guests