Pics of a brew day

Methods, ingredients, advice and equipment specific to all-grain (mash), partial mash (mini mash) and "brew in a bag" (BIAB) brewing.

Pics of a brew day

Postby drsmurto » Friday Jan 18, 2008 11:42 am

It just so happens that i took some happy snaps during my brew day on Wednesday. I was too sick to go to work....... :D

Made 20L of the LCPA recipe i posted yesterday followed by 20L of my house ale - post # 5

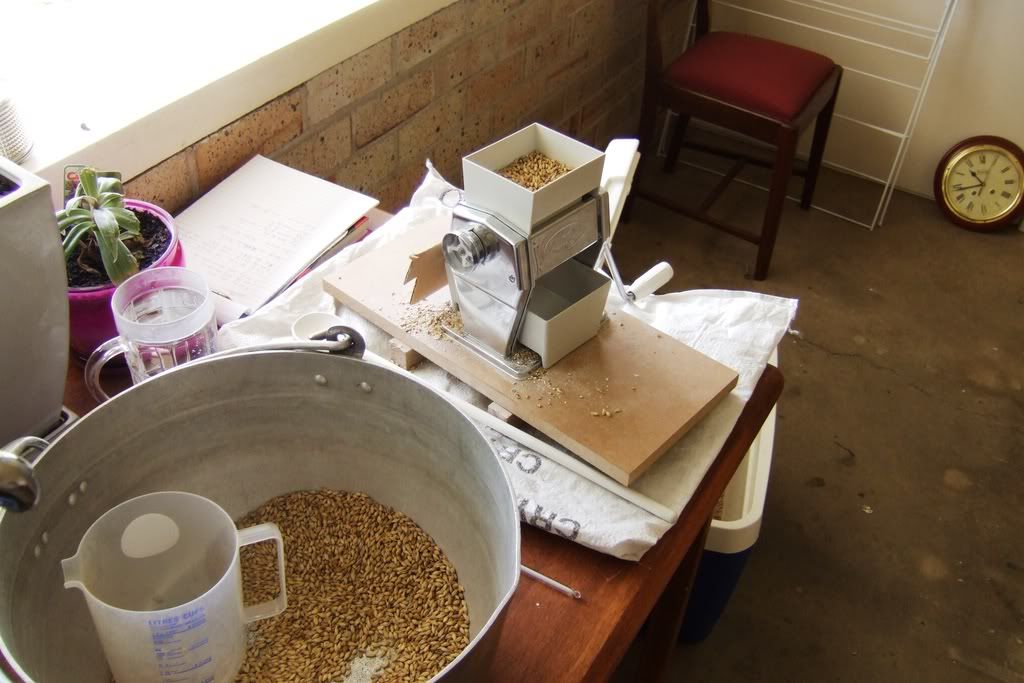
First off, crushing the grains. Done by hand as am yet to get a motor or drill to drive the mill but its kind of therapeutic anyway. Took me about 45 mins to crush 2 batches (~4 kg each).
Image

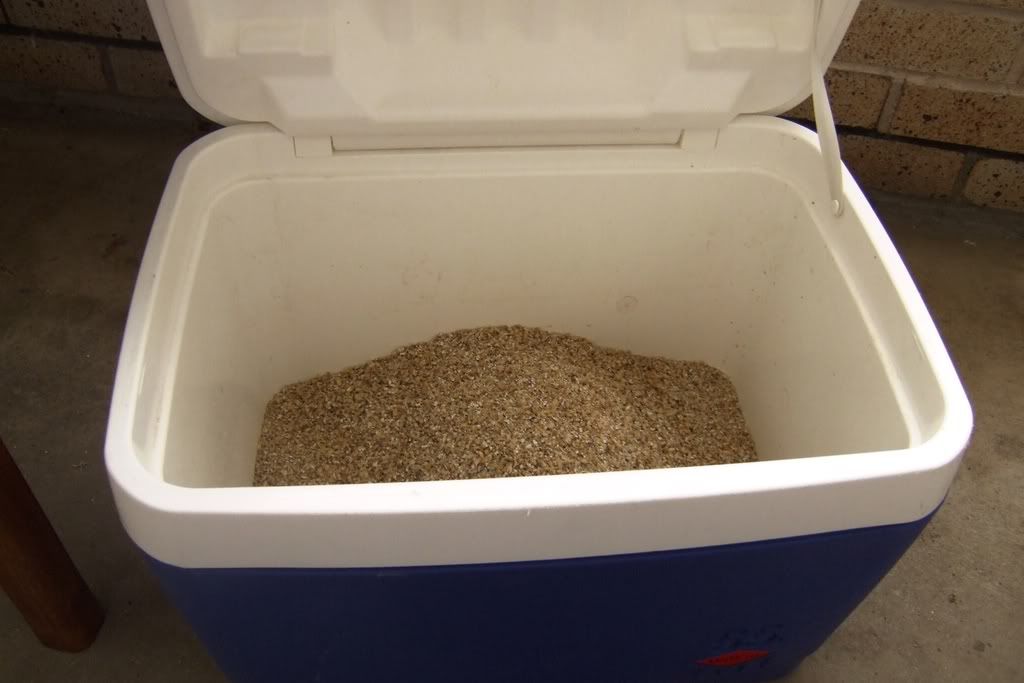
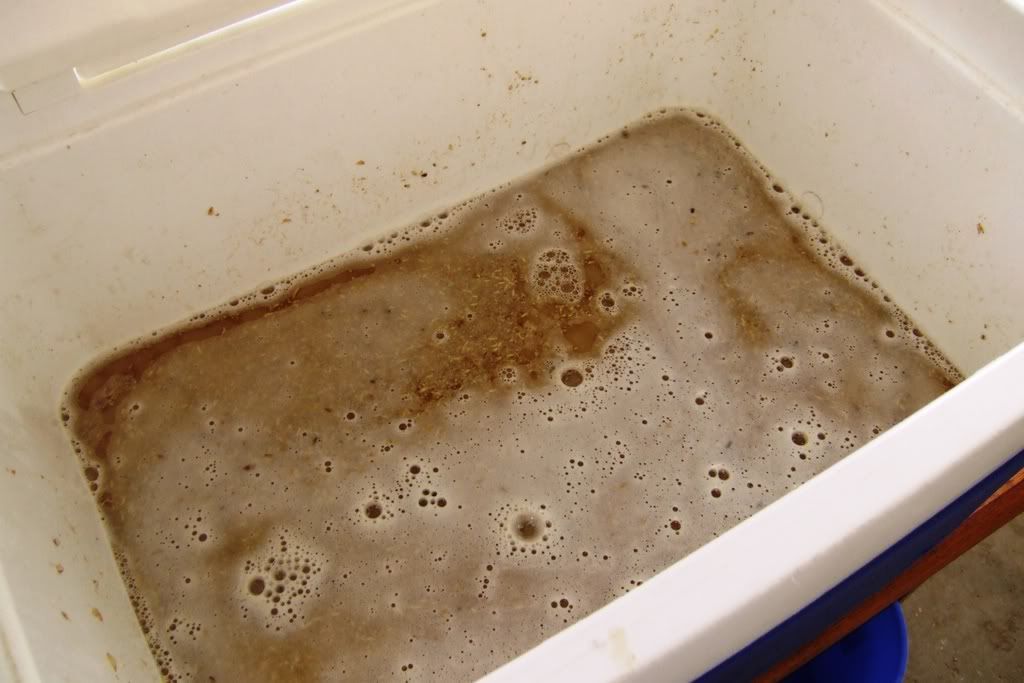
Here's the crushed grain in the esky ready to dough in. One of the advantages of the falsie is that i can crush quite fine and still have no issue with run off.
Image

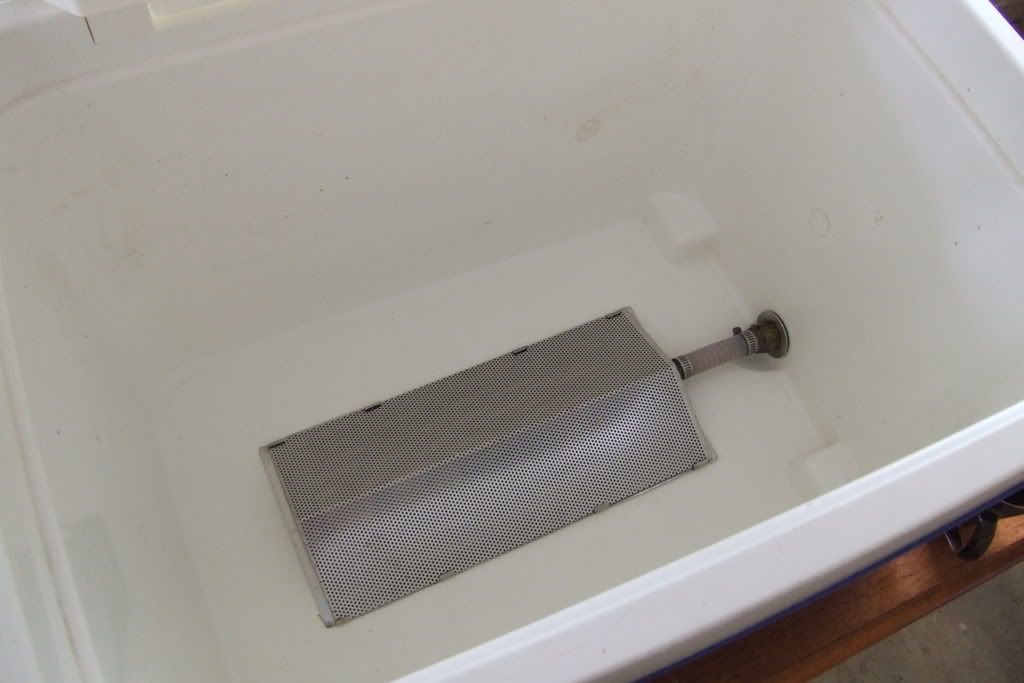
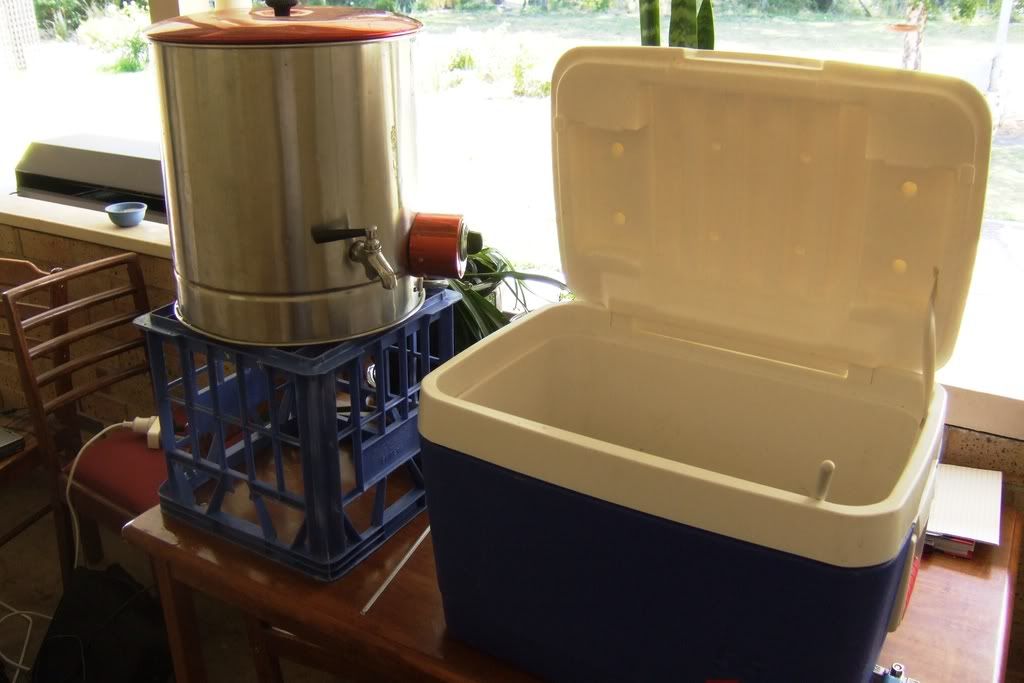
The HLT (my Mums old preserving urn now serving a higher purpose) and the 55L willow esky. Brand spanking new, i bought an identical one off ebay for $20 and managed to convince the partner we could use the old one as a normal esky as i really needed the new one as it would keep a better temp for brewing. I didn't take a pic of the false bottom but its a beer belly falsie and it works a treat! Nice clear run-off, piece of piss to use and clean.
Image

Dough in. This is one of the best smells on brew day, the hot water hitting the freshly crushed grains. Mmmmmmmmmmmmmmmmm.
Image

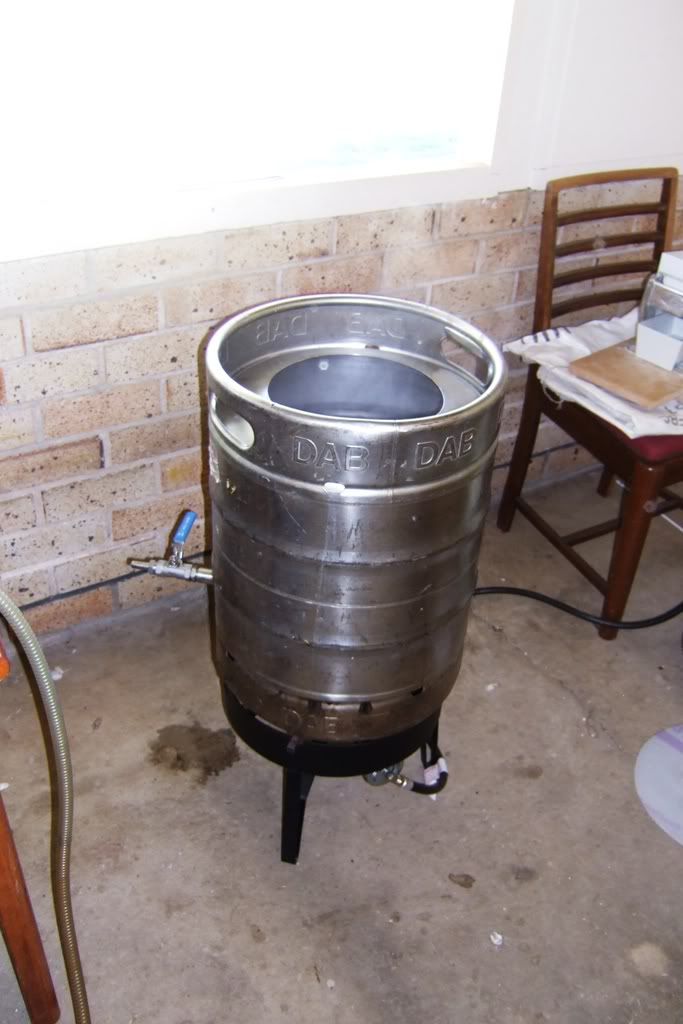
Skipping straight thru the multiple infusions (cos thats just me adding more water to the esky and stirring like a bastard) to the boil in my converted 50L DAB keg. The NASA burner gets it to the boil in 10-15 mins and then i have to turn it right down. Boil for anywhere up to 90 mins. This time i boiled it till it cleared a little before adding 60 min hops so total boil was probably around 75 mins.
Image

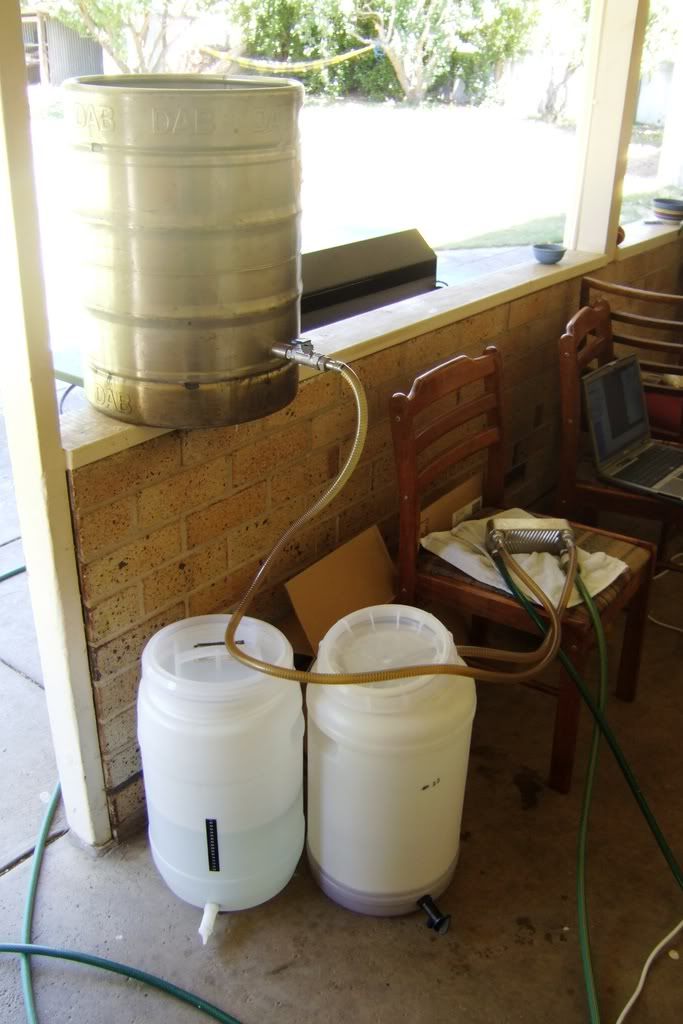
After the boil i whirlpool like crazy and then let it sit for 10 mins before lifting it to a height to allow me to drain it thru the plate chiller (dont get me started on the no chill debate). Single pass gives me a wort anywhere between 25 and 30C depending on how much time i spend tweaking taps.
Image

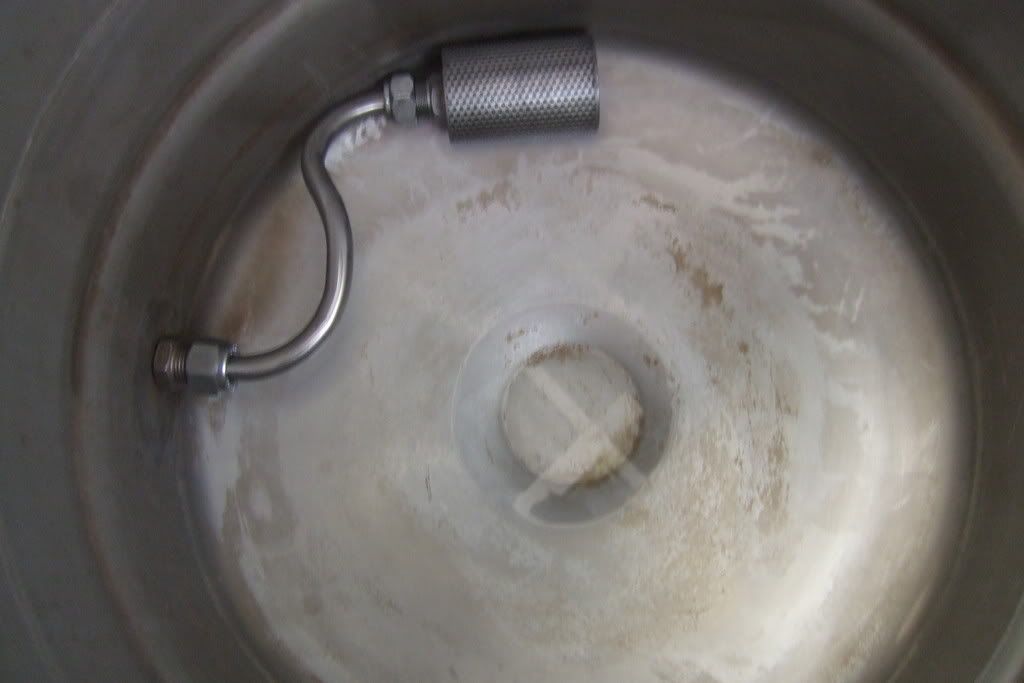
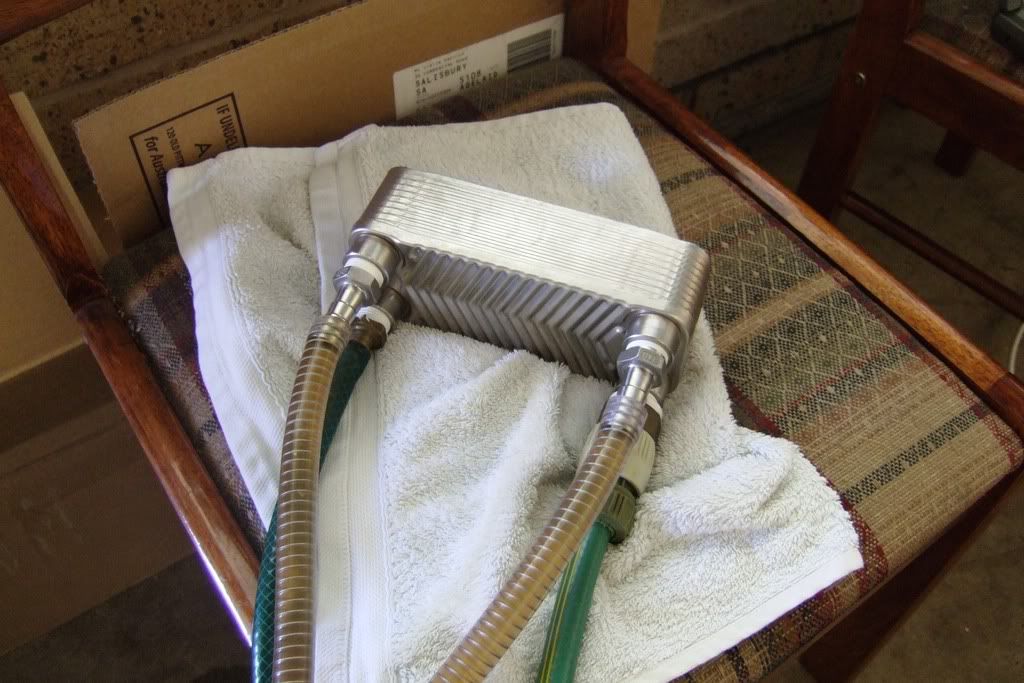
Close-up of the plate chiller
Image

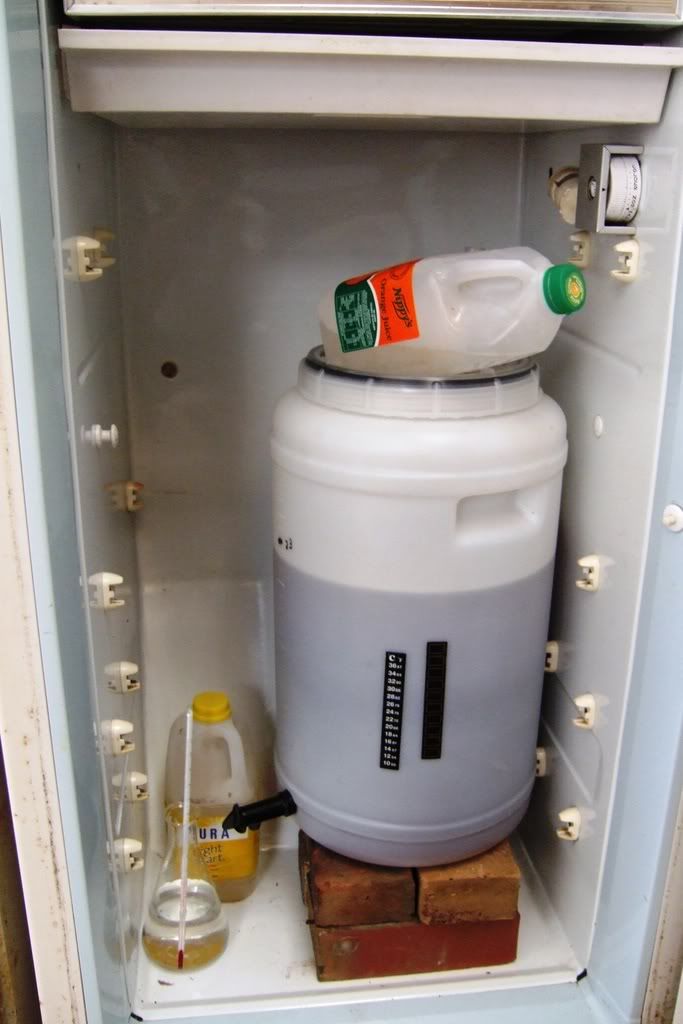
Into the now deceased fermenting fridge. With day time temps here high 20s low 30s and with 2 x 2L bottles i can get temp down to 12C if i rotate them twice a day.
Image

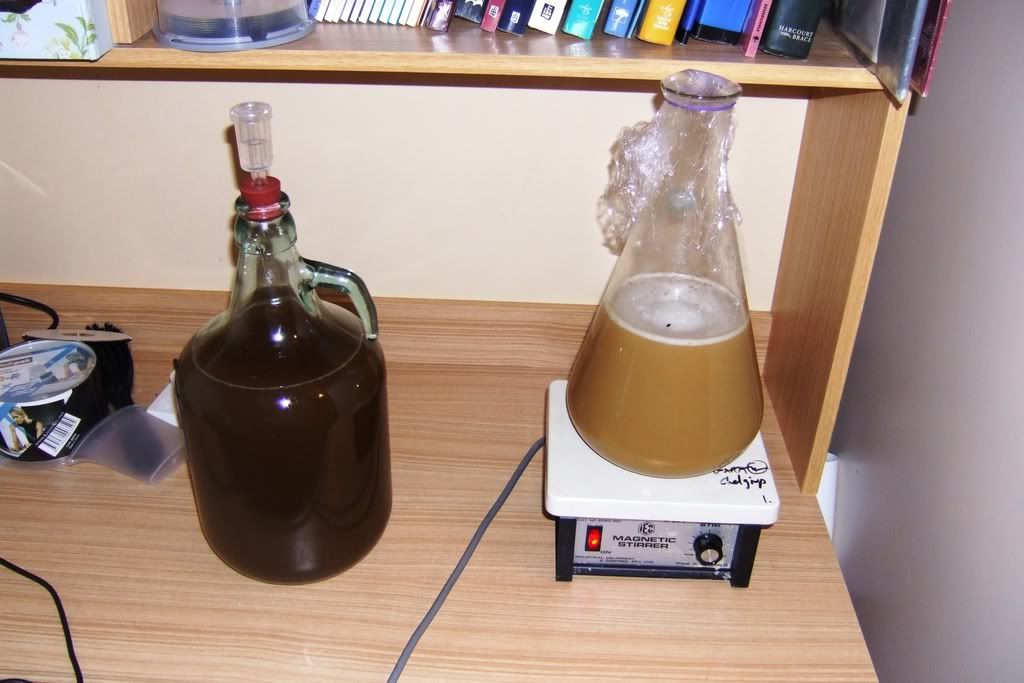
The starter going crazy plus an experimental ginger beer using wheat malt extract. Seems very dark to me..... Turns out the starter is not 1056 as i originally thought, its 1098 and so didnt go into either beers. I will collect the yeast and put it back into the fridge for next time but i reckon i should now have enough yeast to direct pitch into an IPA...
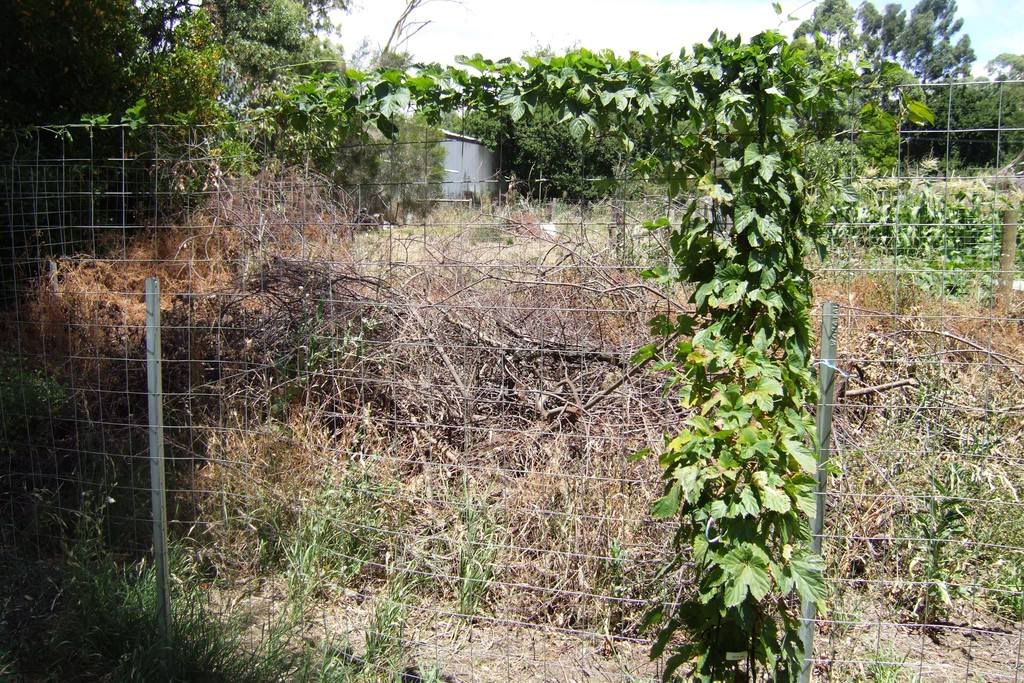
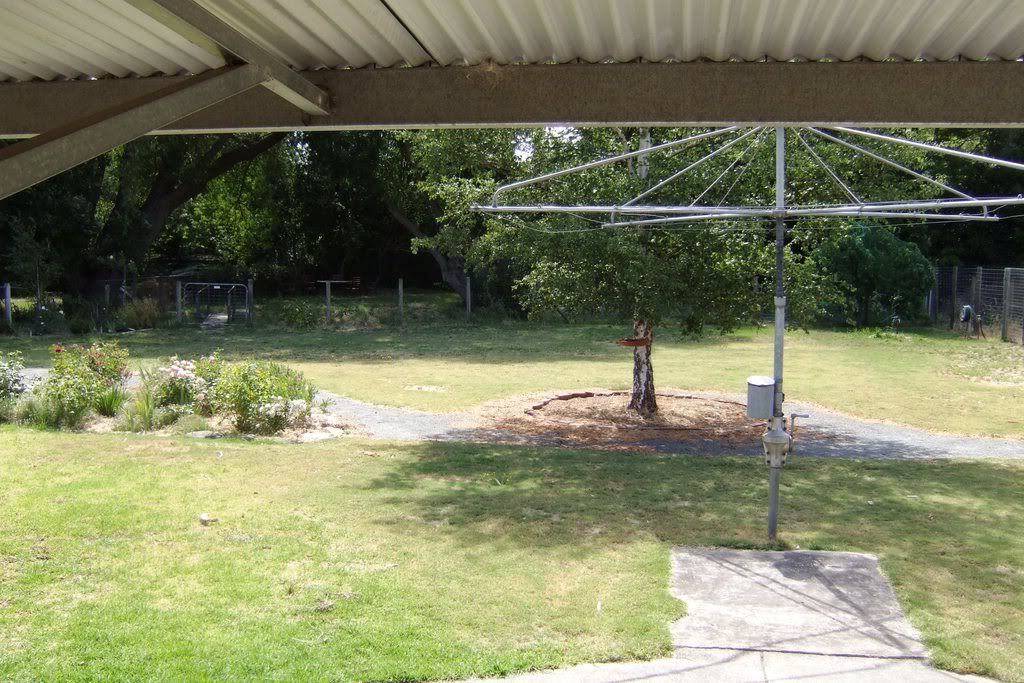
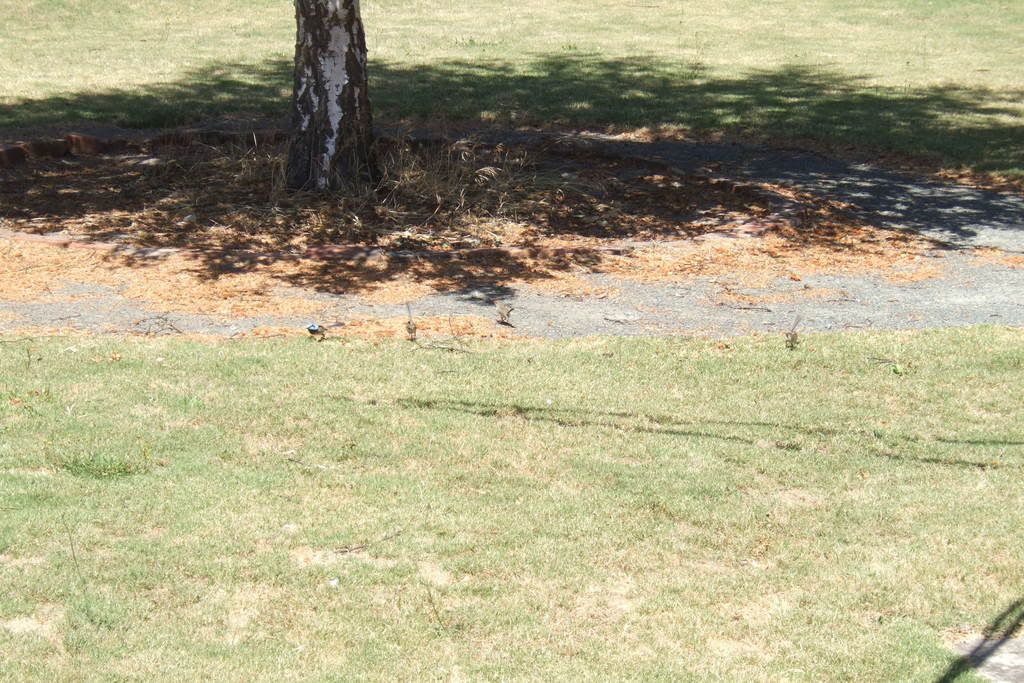
Image

Pic of the backyard
Image

Pic of a few of the locals. My late Nana told me that a garden with blue wrens is one to be proud of. These normally extremely shy little creatures are regular visitors to my oasis from the rat race. In fact, the bird life is amazing here.
Image

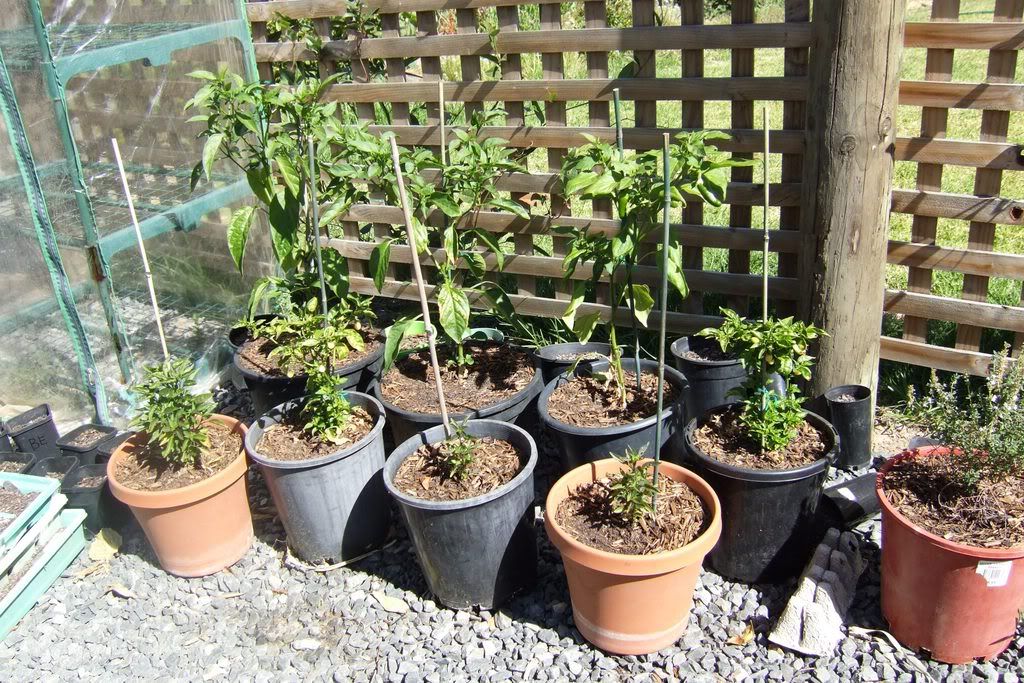
And finally my chill garden, 3 x jalapeños, 3 x bolivian rainbows and 2 x white habaneros. My orange and choc habaneros didnt germinate.
Image

Hope this is useful to those considering going over to the dark side. All up a double brew day took me 10am to 6 pm but then i didn't pre crush the grain and during that time did chores and watched the cricket. A lot of the time is spent waiting altho a double brew day is more manic trying to get dozen of batches of water to a set temp since i was crazy enough to do 52/66/78 steps for both brews! Crazy fool! Single brew days with a single infusion allows me to mow the lawn, and get work done around the house. I would also suggest not cracking the first beer until well into the boil.

Cheers and beers
DrSmurto
User avatar
drsmurto
 
Posts: 3300
Joined: Friday Nov 17, 2006 11:53 am
Location: Adelaide Hills

Re: Pics of a brew day

Postby Kevnlis » Friday Jan 18, 2008 11:55 am

No hop vine pics :(

Virgin mash tun pics though! :twisted:

Your fridge looks to be a bit bigger than the dead one I am planning to use so I should have no worries doing ales even in Bundy! Cheers for that ;)
Prost and happy brewing!

Image
O'Brien Gluten Free Beer
User avatar
Kevnlis
 
Posts: 3380
Joined: Tuesday Jul 10, 2007 5:15 pm
Location: B-Rat

Re: Pics of a brew day

Postby drsmurto » Friday Jan 18, 2008 12:34 pm

Kevnlis wrote:No hop vine pics :(

Virgin mash tun pics though! :twisted:

Your fridge looks to be a bit bigger than the dead one I am planning to use so I should have no worries doing ales even in Bundy! Cheers for that ;)


Will take some pics of the flowering chinook on the weekend if i remember.

Popped the mash tun's cherry 9 brews ago mate.

I would wager the day time temps in Adelaide during summer are higher than Bundy, altho it prob doesnt drop quite as much at night as it does here. I still get dew on the grass each morning! Tis a good use of dead fridges tho!
User avatar
drsmurto
 
Posts: 3300
Joined: Friday Nov 17, 2006 11:53 am
Location: Adelaide Hills

Re: Pics of a brew day

Postby James L » Friday Jan 18, 2008 4:08 pm

PIctures speak a 1000 words... very interesting DrS...

ohhh 400 posts
Image
I freely admit that I was Very Very Drunk....
"They speak of my drinking, but never consider my thirst."
User avatar
James L
 
Posts: 1045
Joined: Thursday Jun 07, 2007 10:11 am
Location: Perth WA

Re: Pics of a brew day

Postby beerdrinker » Friday Jan 18, 2008 7:52 pm

Image heres a pic of the other days mash,hows my thermometer :lol:
Jesus was a homebrewer
beerdrinker
 
Posts: 199
Joined: Wednesday Oct 25, 2006 1:18 pm
Location: sydney

Re: Pics of a brew day

Postby Stubbie » Saturday Jan 19, 2008 4:50 pm

Hey Doc,

Dig the plate chiller. 'Been thinking of getting one myself. What arrangement do you have to filter out the hops upstream of the plate chiller?

Cheers.
Stubbie
 
Posts: 61
Joined: Saturday May 12, 2007 2:03 pm
Location: Melbourne

Re: Pics of a brew day

Postby drsmurto » Monday Jan 21, 2008 9:30 am

Stubbie wrote:Hey Doc,

Dig the plate chiller. 'Been thinking of getting one myself. What arrangement do you have to filter out the hops upstream of the plate chiller?

Cheers.


Glad you asked that question. Brewed again on Saturday and got the camera out to take the pics that i forgot to last time.

Pic of the falsie in the mash tun
Image

Pic of the hopscreen in the kettle - this keeps out most of the crud from blocking up the plate chiller.
Image

A few pics of the chinook plant with some arty close ups of the flowers.
Image

Image

Image

Image
User avatar
drsmurto
 
Posts: 3300
Joined: Friday Nov 17, 2006 11:53 am
Location: Adelaide Hills

Re: Pics of a brew day

Postby Trough Lolly » Monday Jan 21, 2008 1:08 pm

Good to see another Marga Mulino owner out there! 8)

That kettle screen is a ripper - is that commercially available?

Cheers,
TL
Image Image
User avatar
Trough Lolly
 
Posts: 1647
Joined: Friday Feb 16, 2007 3:36 pm
Location: Southern Canberra

Re: Pics of a brew day

Postby Kevnlis » Monday Jan 21, 2008 1:10 pm

Trough Lolly wrote:Good to see another Marga Mulino owner out there! 8)

That kettle screen is a ripper - is that commercially available?

Cheers,
TL


I believe that has come from http://www.beerbelly.com.au/beerequip.html
Prost and happy brewing!

Image
O'Brien Gluten Free Beer
User avatar
Kevnlis
 
Posts: 3380
Joined: Tuesday Jul 10, 2007 5:15 pm
Location: B-Rat

Re: Pics of a brew day

Postby drsmurto » Monday Jan 21, 2008 1:29 pm

Kevnlis wrote:
Trough Lolly wrote:Good to see another Marga Mulino owner out there! 8)

That kettle screen is a ripper - is that commercially available?

Cheers,
TL


I believe that has come from http://www.beerbelly.com.au/beerequip.html


Bingo. I am slowly working my way thru the beer belly site. I have the false bottom, the hopscreen, plate chiller and NASA burner..............
User avatar
drsmurto
 
Posts: 3300
Joined: Friday Nov 17, 2006 11:53 am
Location: Adelaide Hills

Re: Pics of a brew day

Postby James L » Monday Jan 21, 2008 3:06 pm

DId you have to custom make that steel fitting to connect the kettle screen and the kettle? or can they supply that for you?
Image
I freely admit that I was Very Very Drunk....
"They speak of my drinking, but never consider my thirst."
User avatar
James L
 
Posts: 1045
Joined: Thursday Jun 07, 2007 10:11 am
Location: Perth WA

Re: Pics of a brew day

Postby drsmurto » Monday Jan 21, 2008 3:17 pm

It was custom made for me. I took the kettle around and Wayne (beer belly) belted the S bend into the pipe. I tip the kettle as i drain it and leave less than 1L behind. All crud. His stuff, whilst being damn near beer porn, makes brewing much easier. Next on my list is a thermometer fitted to the outlet of the plate chiller so i can easily adjust flow rates to get the ideal mix of speed vs temp.
User avatar
drsmurto
 
Posts: 3300
Joined: Friday Nov 17, 2006 11:53 am
Location: Adelaide Hills

Re: Pics of a brew day

Postby Kevnlis » Monday Jan 21, 2008 3:20 pm

Considering you are such a hop head Doc, I am surprised the hopback was not your first purchase :shock: :lol:
Prost and happy brewing!

Image
O'Brien Gluten Free Beer
User avatar
Kevnlis
 
Posts: 3380
Joined: Tuesday Jul 10, 2007 5:15 pm
Location: B-Rat

Re: Pics of a brew day

Postby drsmurto » Monday Jan 21, 2008 3:22 pm

Kevnlis wrote:Considering you are such a hop head Doc, I am surprised the hopback was not your first purchase :shock: :lol:


Thats why i bought the hop screen! Hop back/flameout additions/dry hopping. Much of a muchness with the amounts i use altho it is on my wish list!
User avatar
drsmurto
 
Posts: 3300
Joined: Friday Nov 17, 2006 11:53 am
Location: Adelaide Hills

Re: Pics of a brew day

Postby James L » Monday Jan 21, 2008 3:41 pm

So DrS, if i contacted beerbelly and asked them that i wanted to buy a kettle with a hopscreen attached to the kettle like yours they'd know who i was talking about?

It looks like a great set up, and being stainless, it looks like it would last a long time.

Also, how much tubing would you need/allow to connect the kettle to the chiller to the fermenter?

And finally, is it recommended to buy some sort of urn for the sparge/mash water? and how do you comtrol the temp on the urn? or is it one of those fan dangled ones that can do it itself?
Image
I freely admit that I was Very Very Drunk....
"They speak of my drinking, but never consider my thirst."
User avatar
James L
 
Posts: 1045
Joined: Thursday Jun 07, 2007 10:11 am
Location: Perth WA

Re: Pics of a brew day

Postby Trough Lolly » Monday Jan 21, 2008 3:49 pm

drsmurto wrote:It was custom made for me. I took the kettle around and Wayne (beer belly) belted the S bend into the pipe. I tip the kettle as i drain it and leave less than 1L behind. All crud. His stuff, whilst being damn near beer porn, makes brewing much easier. Next on my list is a thermometer fitted to the outlet of the plate chiller so i can easily adjust flow rates to get the ideal mix of speed vs temp.


They should sell the S bend fitting as standard gear - it's an excellent mod and I whirlpool as well but have a pathetically inadequate pickup tube bent at right angles to attempt the same outcome. Is there a gap between the screen and the kettle floor? Do you get any scorched matter trapped under the S bend and screen?

Cheers,
TL
Image Image
User avatar
Trough Lolly
 
Posts: 1647
Joined: Friday Feb 16, 2007 3:36 pm
Location: Southern Canberra

Re: Pics of a brew day

Postby drsmurto » Monday Jan 21, 2008 4:29 pm

James L wrote:So DrS, if i contacted beerbelly and asked them that i wanted to buy a kettle with a hopscreen attached to the kettle like yours they'd know who i was talking about?

It looks like a great set up, and being stainless, it looks like it would last a long time.

Also, how much tubing would you need/allow to connect the kettle to the chiller to the fermenter?

And finally, is it recommended to buy some sort of urn for the sparge/mash water? and how do you comtrol the temp on the urn? or is it one of those fan dangled ones that can do it itself?


Wayne (aka beerbelly, aka domonsura on AHB) would know who you were talking about, the kettle i bought separately (from a bloke on AHB) altho he does sell big s/s pots that he fits the hopscreen to. As far as tubing goes, it depends on your setup. I lift my kettle approx 1m off the ground so gravity does all the work for me (aside from the heavy lifting). I have 1-1.5m of tubing running from the kettle to the chiller and then just under 1m from the chiller to the fermenter. All of this is not all that important, i just worked with what tubing i had.

Heating water up is easy using my electric urn, i dunk a thermo in it to see what temp its at altho it does have a dial on it but its in deg F and its not 100% accurate. Ive seen far more experienced brewers than me lugging stock pots of water from inside to strike/sparge with. I was lucky - Mum didnt need her Fowlers preserving urn anymore. She even gave me the preserving jars cos she thought it was for all of my fruit. It serves a higher purpose now!

Trough Lolly wrote:
drsmurto wrote:It was custom made for me. I took the kettle around and Wayne (beer belly) belted the S bend into the pipe. I tip the kettle as i drain it and leave less than 1L behind. All crud. His stuff, whilst being damn near beer porn, makes brewing much easier. Next on my list is a thermometer fitted to the outlet of the plate chiller so i can easily adjust flow rates to get the ideal mix of speed vs temp.


They should sell the S bend fitting as standard gear - it's an excellent mod and I whirlpool as well but have a pathetically inadequate pickup tube bent at right angles to attempt the same outcome. Is there a gap between the screen and the kettle floor? Do you get any scorched matter trapped under the S bend and screen?

Cheers,
TL


I did have a brass pick up tube that left behind quite a bit, nearly 3L at a guess. The hopscreen sits on the kettle floor with about 15mm between the S tube and the floor. Nothing stuck under it so far TL, its been working a treat! Used a heap of EKG and cascade plugs recently in an LPCA ish clone and none came thru.

Cheers
DrSmurto
User avatar
drsmurto
 
Posts: 3300
Joined: Friday Nov 17, 2006 11:53 am
Location: Adelaide Hills

Re: Pics of a brew day

Postby James L » Monday Jan 21, 2008 5:14 pm

finally, would you recommend a 36L pot or a 50L pot? theres about 50 bucks difference (robinox pots).
Image
I freely admit that I was Very Very Drunk....
"They speak of my drinking, but never consider my thirst."
User avatar
James L
 
Posts: 1045
Joined: Thursday Jun 07, 2007 10:11 am
Location: Perth WA

Re: Pics of a brew day

Postby Kevnlis » Monday Jan 21, 2008 5:35 pm

Well worth the $50 now, you will regret it if you don't. I bought a 40L to save $50 over the 60L and I wish I hadn't! A 28L boil (fort a 23L batch) in a 36L pot may be a close call as well.
Prost and happy brewing!

Image
O'Brien Gluten Free Beer
User avatar
Kevnlis
 
Posts: 3380
Joined: Tuesday Jul 10, 2007 5:15 pm
Location: B-Rat

Re: Pics of a brew day

Postby beerdrinker » Monday Jan 21, 2008 11:59 pm

Nice hop plant :wink: That keg of DAB would have been nice
Jesus was a homebrewer
beerdrinker
 
Posts: 199
Joined: Wednesday Oct 25, 2006 1:18 pm
Location: sydney

Next

Return to Grain brewing

Who is online

Users browsing this forum: No registered users and 52 guests