AG Demo @ G&G and Temple Brewing Co.

Other topics - beer-related or not.
buscador
Posts: 301
Joined: Monday Dec 11, 2006 1:19 pm
Location: Melb, VIC

AG Demo @ G&G and Temple Brewing Co.

Post by buscador »

Just watched my first AG demo at G&G today
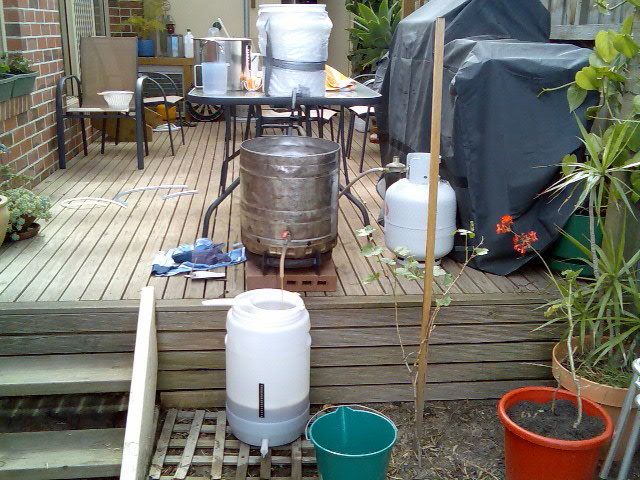
I would like to give anyone who has attempted going all-grains a round of applause for effort, man, so much time, and management, seeing that i do this on theweekends id probably end up oon the couch wondering why my kitchen was on fire :shock:

IMHO, i can only hope to get to that level of commitment, and competency in this art/science form...

id like to watch a few more demos, free beer and ask anything youd like (except, "so, have you seen the celine dion videos on homebrewandbeer.com?")

the head brewer from Temple brewing Co was there and i got to drink the special bitter and the his pale ale, which i can honestly say tastes the most like SNPA than anyother world brew ive ever had..what a treat!
the brewer told me they have a special love for SNPA and I believe i know why!!

b
was anyone else there today?
You had me at dry hopping.
SpillsMostOfIt
Posts: 789
Joined: Friday Nov 24, 2006 5:07 pm
Location: Collingwood, Australia

Post by SpillsMostOfIt »

I wasn't, but I received a visit from someone who was soon after.

It did sound like they like to do it the hard way - at least from a BIABer's point of view...
No Mash Tun. No Chill.

No confirmed fatalities.
buscador
Posts: 301
Joined: Monday Dec 11, 2006 1:19 pm
Location: Melb, VIC

Post by buscador »

id be interested to know what others AGbrewers are doing that makes it easier, definitely need to see another demo, but for the true homebrewer (not in a shop with every toy to play with) it seems there may be afewer steps to still get the job done right.

your thoughts?

b
next time im asking the celine dion question, ill find those spammers :wink:
You had me at dry hopping.
SpillsMostOfIt
Posts: 789
Joined: Friday Nov 24, 2006 5:07 pm
Location: Collingwood, Australia

Post by SpillsMostOfIt »

For tonight's homework, read the following:

http://www.aussiehomebrewer.com/forum/i ... opic=11694

and summarise... :wink:

Seriously, it's almost how I brew. Even if it isn't for you, you don't lose much by doing it this way as the only purchase you make that you don't use should you move on is the baggie.

I've gone a step or two further - I use electric immersion heaters, but you can use whatever heat source you think is necessary. I No-Chill - this means I turf the whole lot into a plastic jerry can and leave it to cool down in its own time. So, all you need to make all-grain beer is a big pot, a good heat source, a baggie you get your auntie to make up and a plastic jerry can. The rest you already have.

Warning: People who brew with traditional homebrew methods may refuse to accept this as a valid approach. You decide... :wink:
No Mash Tun. No Chill.

No confirmed fatalities.
buscador
Posts: 301
Joined: Monday Dec 11, 2006 1:19 pm
Location: Melb, VIC

Post by buscador »

To Prof. SMOI,

I look forward to your next class. As an avid learner, I await the next helpful lesson.

Thanks for your help. Again, just to see the gear being used today has been an eye opener. It's hard to read about these things without ever getting the hands on.

I spoke with the head brewer/owner? of Temple and he broke it down to me that once you find your recipe the rest is adding/dropping variables in order to "get it right".

Looking forward to the future studies.

Best,
Your favourite student 8)
You had me at dry hopping.
Fents
Posts: 48
Joined: Thursday Oct 20, 2005 10:52 am
Location: Melbourne
Contact:

Post by Fents »

I did 3 AG's then quit cause i thought it was too long. Takeing me 4-5 hours to make 23 litres of beer in which i used to knock up in 15-20mins with a K&K....

Then i rememberd how good AG beer tasted and asked the folks on AHB for some inspiration to get back into it...

To help reduce time on brew day i do a couple of things :

1. try and "prepare" everything. i.e fill pots with 15 litres of water before bed (so all i have to do is turn it on), pre weigh all hops and try and have as much ready as poissible come brew day

2. Changed my mash tun from a plastic false bottom to Stainless Braid - Now when sparging instead of taking 1 hour it takes 20 mins. (batch sparging)

3. When i start the boil and have added the first hop addition i start cleaning up all the other stuff, mash tun, lids, pots etc.

4. No chill

This has all cut my brewday down to about 3.5 - 4 hours max. Seems like a long time but its not.

If your happy with the Kit flavour and dont have 4 hours to spare stick with Kits. If you've tasted AG beer you'll know why people spend 4 hours brewing...
User avatar
drsmurto
Posts: 3300
Joined: Friday Nov 17, 2006 11:53 am
Location: Adelaide Hills

Post by drsmurto »

Its such a balance between time and effort. I find that with all the spec grain i add, multiple hop additions it takes me 3 hours and thats just kits/extracts.

So i have sworn my next beer WILL be AG. i am determined to pop my AG cherry and stop mucking around trying to improve my kit brews.

I will say this tho - there are many good kit recipes on here. Boonies LCPA and Pale Ales JSGA are winners. Its not hard to improve kit beers but if you are like me and want to make the best beer i possibly can then a little bit of time is a small price to pay.

I have sourced bits and pieces for next to nothing thru mates/rellies and ads in the paper. Some people have $1000 s/s bling breweries, mine is going to be pov from the start to the finish. That way i get into AG sooner.
User avatar
lethaldog
Posts: 2716
Joined: Wednesday Jul 19, 2006 11:13 am
Location: Victoria

Post by lethaldog »

My Ag setup cost no where near $1000 and it works great, i dont use bags but i use a round style esky, 40 litre pot, imersion copper chiller, rambo 4 ring burner, 19 litre stainless pot ( for heating water) and a few other bits and pieces, easy as to setup and for me on brew day time is no matter cos i love it and get to spend lots of time in the shed but it usually takes about 5 hours from start to finish and that includes from crushing grain to the very last steps i.e filling fermenter and adding yeast. The missus helps with the clean up and that usually takes about an extra half an hour but its all worth it for the end result :lol: :wink:

I had to add that all that ag talk made/forced/dragged me out to the shed kicking and screaming (not) to my keg fridge to pour one of my ag pilsners and i am sitting here enjoying/drooling over it as we speak so thanks for the inspiration guys :lol: :lol: :lol:
Cheers
Leigh
buscador
Posts: 301
Joined: Monday Dec 11, 2006 1:19 pm
Location: Melb, VIC

Post by buscador »

its you guys that inspire me to learn more
since hitting this forum ive picked up so many other resources
im on the kits, moving into better extracts everyday, well, weekends

im on brew#18, and im hoping that AG will be sooner than llater, but it will come oneday, would really like to taste some of the brews on this forum just to see whats out there

IMHO my kits rank up there with dan murphys stockpile..
its the fellow brewers brews im after...
any secret ebays i should know about!?!

b :lol:
You had me at dry hopping.
Fents
Posts: 48
Joined: Thursday Oct 20, 2005 10:52 am
Location: Melbourne
Contact:

Post by Fents »

Dont ever let anyone tell you cheap AG setups dont make good beer.

Im currently using a 25lt bucket with braid and isulated camping mat as a mash tun - $50

I batch spage using a 15 litre poit i heat on the stove - $0 (already had it)

Kettle is a 50litre keg with tap - $80

4 ring burner - $60 (rays outdoors)

No chill fermenter - $0 (already had it)

And check out my bling brewstand (it doubles as a patio / decking ;))

Image

One day when i have a shed or the cash i'll build a stand and get a proper system - proper HLT, Pumps etc. but until then im happy with my beer.
DarkFaerytale
Posts: 300
Joined: Tuesday Jun 06, 2006 4:04 pm
Location: Springvale south, Melbourne

Post by DarkFaerytale »

once again, i love the picture of your stand fents, 60 bucks for a 4 ring burner! bargain! mine cost almost twice that mind you i'm lazy and didn't shop around

again i'v missed out on the G+G brew day and my only excuse was that it was raining and i couldn't be stuffed walking from the train station in the rain, hopefully i'll get down there some time soon as i'd really love to meet the guys especially since i'v been ordering off them at least once a week for the last couple of months. plus i wouldn't mind a bottle of schneider aventinus ;) hard stuff to get in keysborough :P

-Phill
Image
User avatar
drsmurto
Posts: 3300
Joined: Friday Nov 17, 2006 11:53 am
Location: Adelaide Hills

Post by drsmurto »

Nice work there Fents - I am oh so close to getting all i need for an AG setup, even managed to scrounge a 25L urn that Mum used to use to preserve fruit so i have a HLT! The esky is my next step - can you get us a close up shot of the inside of the bucket. Is it a false bottom or a simple copper tubing thingy?

The scientist in me must compliment you on the ingenious use of gravity in your setup. Will be my method, was even thinking of having the fermenter sitting in the creek so i have a natural chilling source...... but i would need a very long extension cord for the HLT or about 20m of tubing .

Where did you source that kettle? Am looking at a pot from one of the italian importers/wholesalers here in Adelaide. Do you have any mor epics over on AHB?

Cheers
DrSmurto
User avatar
rwh
Posts: 2810
Joined: Friday Jun 16, 2006 1:47 pm
Location: Melbourne, Australia
Contact:

Post by rwh »

drsmurto wrote:can you get us a close up shot of the inside of the bucket.
http://cruisenews.net/brewing/infusion/page1.php
w00t!
User avatar
drsmurto
Posts: 3300
Joined: Friday Nov 17, 2006 11:53 am
Location: Adelaide Hills

Post by drsmurto »

What is this

Does the liquid get into this somehow? Stupid question it may be but i am a scientist and wouldnt know one end of a hammer form the other so shit like this is not what my brain was wired to do...... :(
User avatar
rwh
Posts: 2810
Joined: Friday Jun 16, 2006 1:47 pm
Location: Melbourne, Australia
Contact:

Post by rwh »

From the article:
The stainless steel hose braid comes from a toilet water supply hose, and I cut the ends of the hose off with a big wire cutter. The stainless braid slips right off the hose inside it. Fold and crimp one end with a pliers, and slip the other end over the copper tube with a hose clamp. Push the drilled stopper over the copper tube so that the narrow end of the stopper is pointed away from the stainless braid. Add a piece of tubing and you are all set.
I cut the ends off my toilet water supply hose using a hatchet. The picture you linked to is the assembly described above inserted into the bottom of a cylindrical beverage cooler type esky thing.
w00t!
User avatar
drsmurto
Posts: 3300
Joined: Friday Nov 17, 2006 11:53 am
Location: Adelaide Hills

Post by drsmurto »

Sorry rwh, i am really this stupid when it comes to these sort of things. Scary when i understand quantum mechanics, molecular orbital theory and Einsteins theory(s) of relativity.

How does the liquid get thru this? I have seen copper tubing with slashes underneath but i dont get how this works. I have never had a close look at this stuff so i dont get it.

Its just sounds too easy rwh - am i missing something or is it simple?
User avatar
rwh
Posts: 2810
Joined: Friday Jun 16, 2006 1:47 pm
Location: Melbourne, Australia
Contact:

Post by rwh »

It's simple. The stainless steel braid is porous and will act like a sieve. It's kind of like a plait (the kind that little kids use to pigtail their hair) which is wrapped around a plastic tube. It's there to stop the tube from bursting. But if you cut the ends off and remove the tube from inside the braid all you have left is the plaited stainless steel wire, in the shape of a tube. Then you squash one end flat to seal it, and clamp the other end to your outlet hose, and you have a quick and easy manifold. It's probably only really suitable for batch sparging, but that's a whole other story.
w00t!
User avatar
drsmurto
Posts: 3300
Joined: Friday Nov 17, 2006 11:53 am
Location: Adelaide Hills

Post by drsmurto »

Cheers rwh. Very good, quick, simple answer for technophobes like me. Sounds like what i need. Now to commandeer the nearest bucket....
User avatar
gregb
Moderator
Posts: 2620
Joined: Saturday Sep 25, 2004 9:12 am
Location: Sydney

Post by gregb »

rwh wrote:I cut the ends off my toilet water supply hose using a hatchet.
Nice. I like it. 8)

Cheers,
Greg
Fents
Posts: 48
Joined: Thursday Oct 20, 2005 10:52 am
Location: Melbourne
Contact:

Post by Fents »

drsmurto wrote:Nice work there Fents - I am oh so close to getting all i need for an AG setup, even managed to scrounge a 25L urn that Mum used to use to preserve fruit so i have a HLT! The esky is my next step - can you get us a close up shot of the inside of the bucket. Is it a false bottom or a simple copper tubing thingy?

The scientist in me must compliment you on the ingenious use of gravity in your setup. Will be my method, was even thinking of having the fermenter sitting in the creek so i have a natural chilling source...... but i would need a very long extension cord for the HLT or about 20m of tubing .

Where did you source that kettle? Am looking at a pot from one of the italian importers/wholesalers here in Adelaide. Do you have any mor epics over on AHB?

Cheers
DrSmurto
Close ups of the cheapo mash tune

The whole thing
Image

The braid setup:
Image
Image
Image
Image

Basically its juts a brass T piece, 2 plastic hose irragation things like these :Image

Those black plastic irragation things thread into the thread on the T Piece. then all you do is slip the braid over the plastic things and secure with hose clamps. Then thread the tap onto the outside of bucked into tap, make sure you seal with washers. trust me in no hamdyman and if i can do it anyone can.
Post Reply